
It’s Spring, and good Cannabis is relatively easy to grow
By Ken Magri
They don’t call it “green gold” for nothing. At $4.6 billion, Cannabis was California’s second largest cash crop in 2020, second only to almonds at $5.2 billion.
As a way to celebrate 4/20, why not try growing cannabis at home? Anyone who can grow a decent crop of backyard tomatoes can grow dispensary-quality buds. And if you regularly shop at dispensaries, this is a little like growing your own money.
Start with good seeds or clones
Today’s cannabis seeds benefit from the accumulated research of thousands of growers. Seeds sold at local dispensaries are guaranteed to be female, and come in a wide variety of strains, including Cannabis indica, sativa, hybrid and even CDB-only strains with no psychoactive properties.
The local dispensaries that sell seeds will most likely also sell clones, which are starter cannabis plants. Clones come from branches that were clipped, or “cloned” from a mother plant. Clones are best for a quick start, because they come ready to transplant, at 6-10 inches high.
On rare occasions, a perfectly good seed will pop out of a store-bought bud. Sometimes it’s because of genetics, a sort-of hermaphroditic fluke. Or a bit of male pollen might have found its way there. In any case, consider it a gift from the grower. If you find a seed, and it appears spotted or marbled, and darkish, it is ready to plant.
How to germinate a seed
Everyone has a favorite method for germinating seeds, but the “Amsterdam technique” is the most reliable. Fill a dish with filtered water and drop in a folded paper towel. Place a cannabis seed between sheets of the submerged paper. Leave the dish in the dark for a couple days, or until a white sprout pokes out from the seed a half-inch or so. When germinating, make sure that the seed is always wet.
Seed-scuffing isn’t necessary, but it will help the germinating process. Scuff up part of the seed with fine sandpaper or an emery board before germinating. This creates a weak spot for the new growth to break through. Once the seed has germinated, place the new sprout in potting soil, about a half inch deep.
Try indoor over outdoor growing
Growing outdoors is less expensive, because the sun is free. But it’s illegal in Sacramento County, and the plants will begin stinking up the neighborhood in September. Insects are also more likely to infest outdoor plants. Likewise, if outdoor plants get rained on during the budding phase, mold can set in, so harvesting must be done immediately.
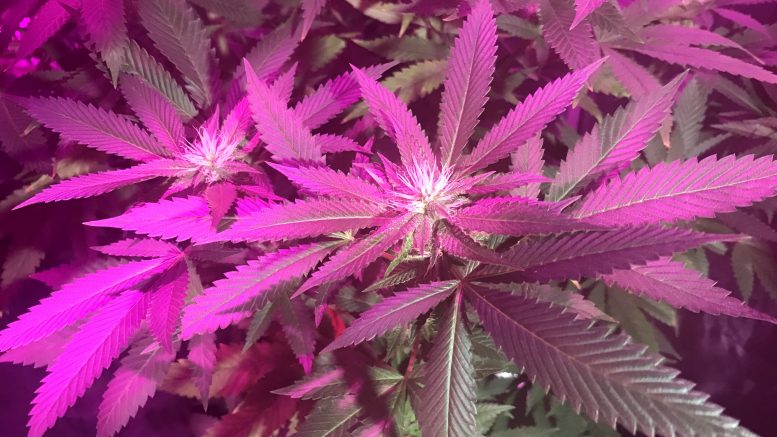
Indoor growing eliminates these issues. But “indoors” doesn’t necessarily mean hydroponic growing. Plants in an indoor grow tent do equally well in soil containers, and won’t require the meticulous attention needed for other grow mediums or hydroponic systems.
For under $250, a grow room can be installed in an interior as small as a closet. Simple grow-tents allow 24/7 growing all year long. More importantly, they eliminate the risk of bug and mold infestation and nosey neighbors.
There are several single-plant tent designs, costing as little as $60. Winado makes a 2 ft. x 4 ft. black grow tent that can be bought through Home Depot. Full spectrum grow lamps can be found online for as little as $40. A small fan, a timer and power-strip extension cord will also be needed for the final set up.
Planters, soils and fertilizers
Don’t plant cannabis in cheap dirt. The plant will absorb all the toxins inside that dirt, which you will be inhaling months later.
Big Rootz® super-soil was the Emerald Cup winner for best cannabis soil in Northern California. But at $150 per cubic yard, is can be pretty cost-prohibitive. Local nurseries and grow shops carry great affordable potting soils for less money, and the workers don’t snicker when you say you’re growing cannabis.
Use one good fertilizer for the growing stage, another for the flowering stage, and a final nutrient at the end, to thicken up the buds and increase the yield.
The recommended amounts on most fertilizers are set as high as the plant will tolerate without burning up from over-feeding. A different approach is to dilute the fertilizer downward in strength, and feed the plant more regularly than recommended. This puts less stress on the plant by giving it a lighter and steadier supply of nutrients.
Overwatering
Overwatering is the most common mistake made by backyard growers. Don’t drown the plant with each watering. Roots in waterlogged soil can die because they can’t absorb needed oxygen. When overwatered, the cannabis leaves will curl downward and turn yellowish.
To prevent overwatering, use a more breathable fabric container, or one with several drainage holes at the bottom. Set the container upon a grate, a half-inch above the ground. Use a water meter to monitor saturation. When in doubt, lift the container. If it feels too heavy, cut back on watering until the top few inches of soil are dry.
How to initiate the flowering period
Indoor growers must initiate their own flowering period. Cut the light cycle from 22 hours per day down to 11 hours. The plant will think autumn is coming and start flowering. Switch to a fertilizer designed for this stage, and grow for 7-9 more weeks before harvest time. Towards the end, use a bug thickener, but stop fertilizing and flush out the nutrients with water once or twice before harvesting.
When to harvest and trim
Harvest the plant when half of the cannabinoids on a bud turn from milky to opaque white. A strong magnifying glass is needed to see them up close. The more mature the plant, the stronger its effects. Some growers will harvest only a part of the plant, leaving the rest to grow a bit longer.
Dry the harvested plants by hanging them in the coolest, darkest place possible. A fan helps keep the air flowing. The longer it takes to dry, the better. When a branch snaps upon bending, it is completely dry. The buds should be sticky, but also dry.
There are different philosophies to trimming. While some favor a light dry trim, others trim as soon as the plant is harvested, snipping away fresh leaves to get a tighter bud. In either case, use good, small scissors, or buy bud trimming shears at a grow store.
Keep the trimmed buds inside glass jars, in a cool place and away from light. For the first month after harvesting, remember to open the jars up every so often, to let some air in and make sure there is no residual moisture that could create mold.
For more information on growing, there are a multitude of websites. But Growweedeasy.com is a good overall resource for advice from seed-to-harvest.
Happy growing!
Are there any other small tips that a closet grower could use and at harvest is it necessary to dry plants hanging upside down and does bat manure make for a larger yeild?